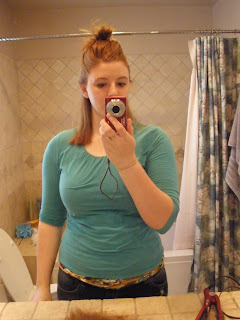
I cut my own hair more than anyone else cuts my hair, because I feel like if I let anyone else do it, they wouldn't do it quite right, and I would feel bad blaming anyone else for my hair not turning out the way I want. I've made some grand mistakes...and I think I've finally got it down to a point where I feel comfortable giving other people the tips! DISCLAIMER: By no means is this a perfect way or art. This works for my hair and I hope to give some tips that will help you in your quest to cut your own curly hair! (or straight hair, actually)
I am going to cut my hair shorter, and layer it. I'm kind of afraid of layering too high up, so it usually takes a couple tries for me to get the layering exactly how I want it.
This is my hair currently (pre-cut). I straighten my hair before I cut it.
It makes the hair more manageable to me, and I can see exactly
where I'm cutting and where my hair will lay and everything.
As you can see, I have my straightener, my hair brush, and
my scissors from 4th grade (which I kept forgetting to return...oops).
Obviously hair-cutting scissors would do a better job, this is just
what I've been using for EVER.
This is also a pre-cut shot. This is how I tried to layer my hair last time.
I put my head down sideways and cut straight across. That didn't work.
It gave me a kind of mullet-type ish thing. It was awful. DON'T DO THIS!
To begin, part your hair how you want it, and then cut everything the same
length. This is how long you want your longest layer to be. Keep in mind,
this layer will get a little bit shorter, because you will blend everything later.
Next I pin up everything but the bottom, so I can make sure the bottom
layer is straight. You can see here that the front is longer than the back. That
will usually happen, unless you take the time to fix it. I basically just work it
until it's all the same length. I didn't have another mirror or a medicine cabinet
to play with to see the back, so I was just guessing and turning around a lot.
Yay! Everything is the same length! It looks like a shelf, which is a BAD thing
for curly hair, but I promise, it's not the end yet!
I pulled a part over just to make sure EVERYTHING was the same length.
This is all before I being layering my hair. Extra snipping and double-double
checking is not a bad thing. This usually doesn't take me more than 2 hours
(which I know is a long time, but usually it's closer to 1 hour)
See how this is all the same length? Now we can start layering!!
So I pin up everything but the bottom layer. To layer, hold the scissors
so the point is upwards, and just cut upwards and outwards, so the flat of the
blades are parallel to your head. You do this for every layer of hair that you
bring down. This helps your hair not have the 'shelf' look at the bottom.
Mine still did after this specific part, because, like I said, I'm afraid of
layering too much.
Terrible pictures, I know, but this is the end, after blending. I didn't take
a picture of blending. But, what you do is point the scissors upwards again,
and instead of cutting outwards, put the blades perpendicular to your head
and cut upwards in little snips so that the layers blend together.
Let me know how it goes!


No comments:
Post a Comment